Archive | black beans RSS feed for this section

Arugula + Black Bean Stuffed Sweet Potato w/ Poached Egg

28 Jul

This recipe is so simple it feels wrong to toot my own horn, but that’s my very first poached egg you guys.  Ever.  I feel like I should get a foodie gold star right now!  Poached egg dance!  Poached egg dance!  Poached egg dance!  (PS – IDGAF if you think eggs are meat.  I consider this a meatless recipe, so put it in your Meatless Monday rolodex, yo.)

Stuffed-Sweet-Potato-Black-Beans-Arugula-Poached-Egg


Arugula & Black Bean Stuffed Sweet Potato w/ Poached Egg (from How Sweet It Is)

  • sweet potato
  • arugula
  • black beans, drained and rinsed
  • shredded cheese
  • 1 lg egg
  • olive oil, salt, pepper

First, cook the sweet potato using your method of choice (microwave, slow-cooker, oven, etc.).  Since I don’t care for the skin, I usually bake mine in a 400*F oven for about an hour, remove the skin and put the potato in a small dish.  You do you, though.  While the potato is cooking, I suggest tossing some arugula in extra virgin olive oil, salt, and pepper:

arugula-olive-oil-salt-pepper

Then, a great idea is to start fretting about cooking a poached egg.  This includes, scouring Pinterest, rapid-firing search terms into Google, calling your mom and cursing her for not answering, and then finally realizing you have 13 eggs in the house so just friggin’ throw one in some water all ready.  But not really throw!  Because you have to be careful with eggs, you know.  Anyway, I did what I was told and followed Smitten Kitchen’s tutorial for the perfect poached eggs. As I waited for my water to boil, I topped my sweet potato with some cheddar cheese, about 1/2 c. of black beans which had been rinsed but were unseasoned, and my arugula.

Stuffed-Sweet-Potato-Arugula

This was probably the most nerve-wracking thing I’ve ever done right here!

1st-ever-poached-egg

Having absolutely no frame of reference for if something is done or not really creates anxiety when you could ruin your whole dinner with one little poke.  But then….

Stuffed-Sweet-Potato-2

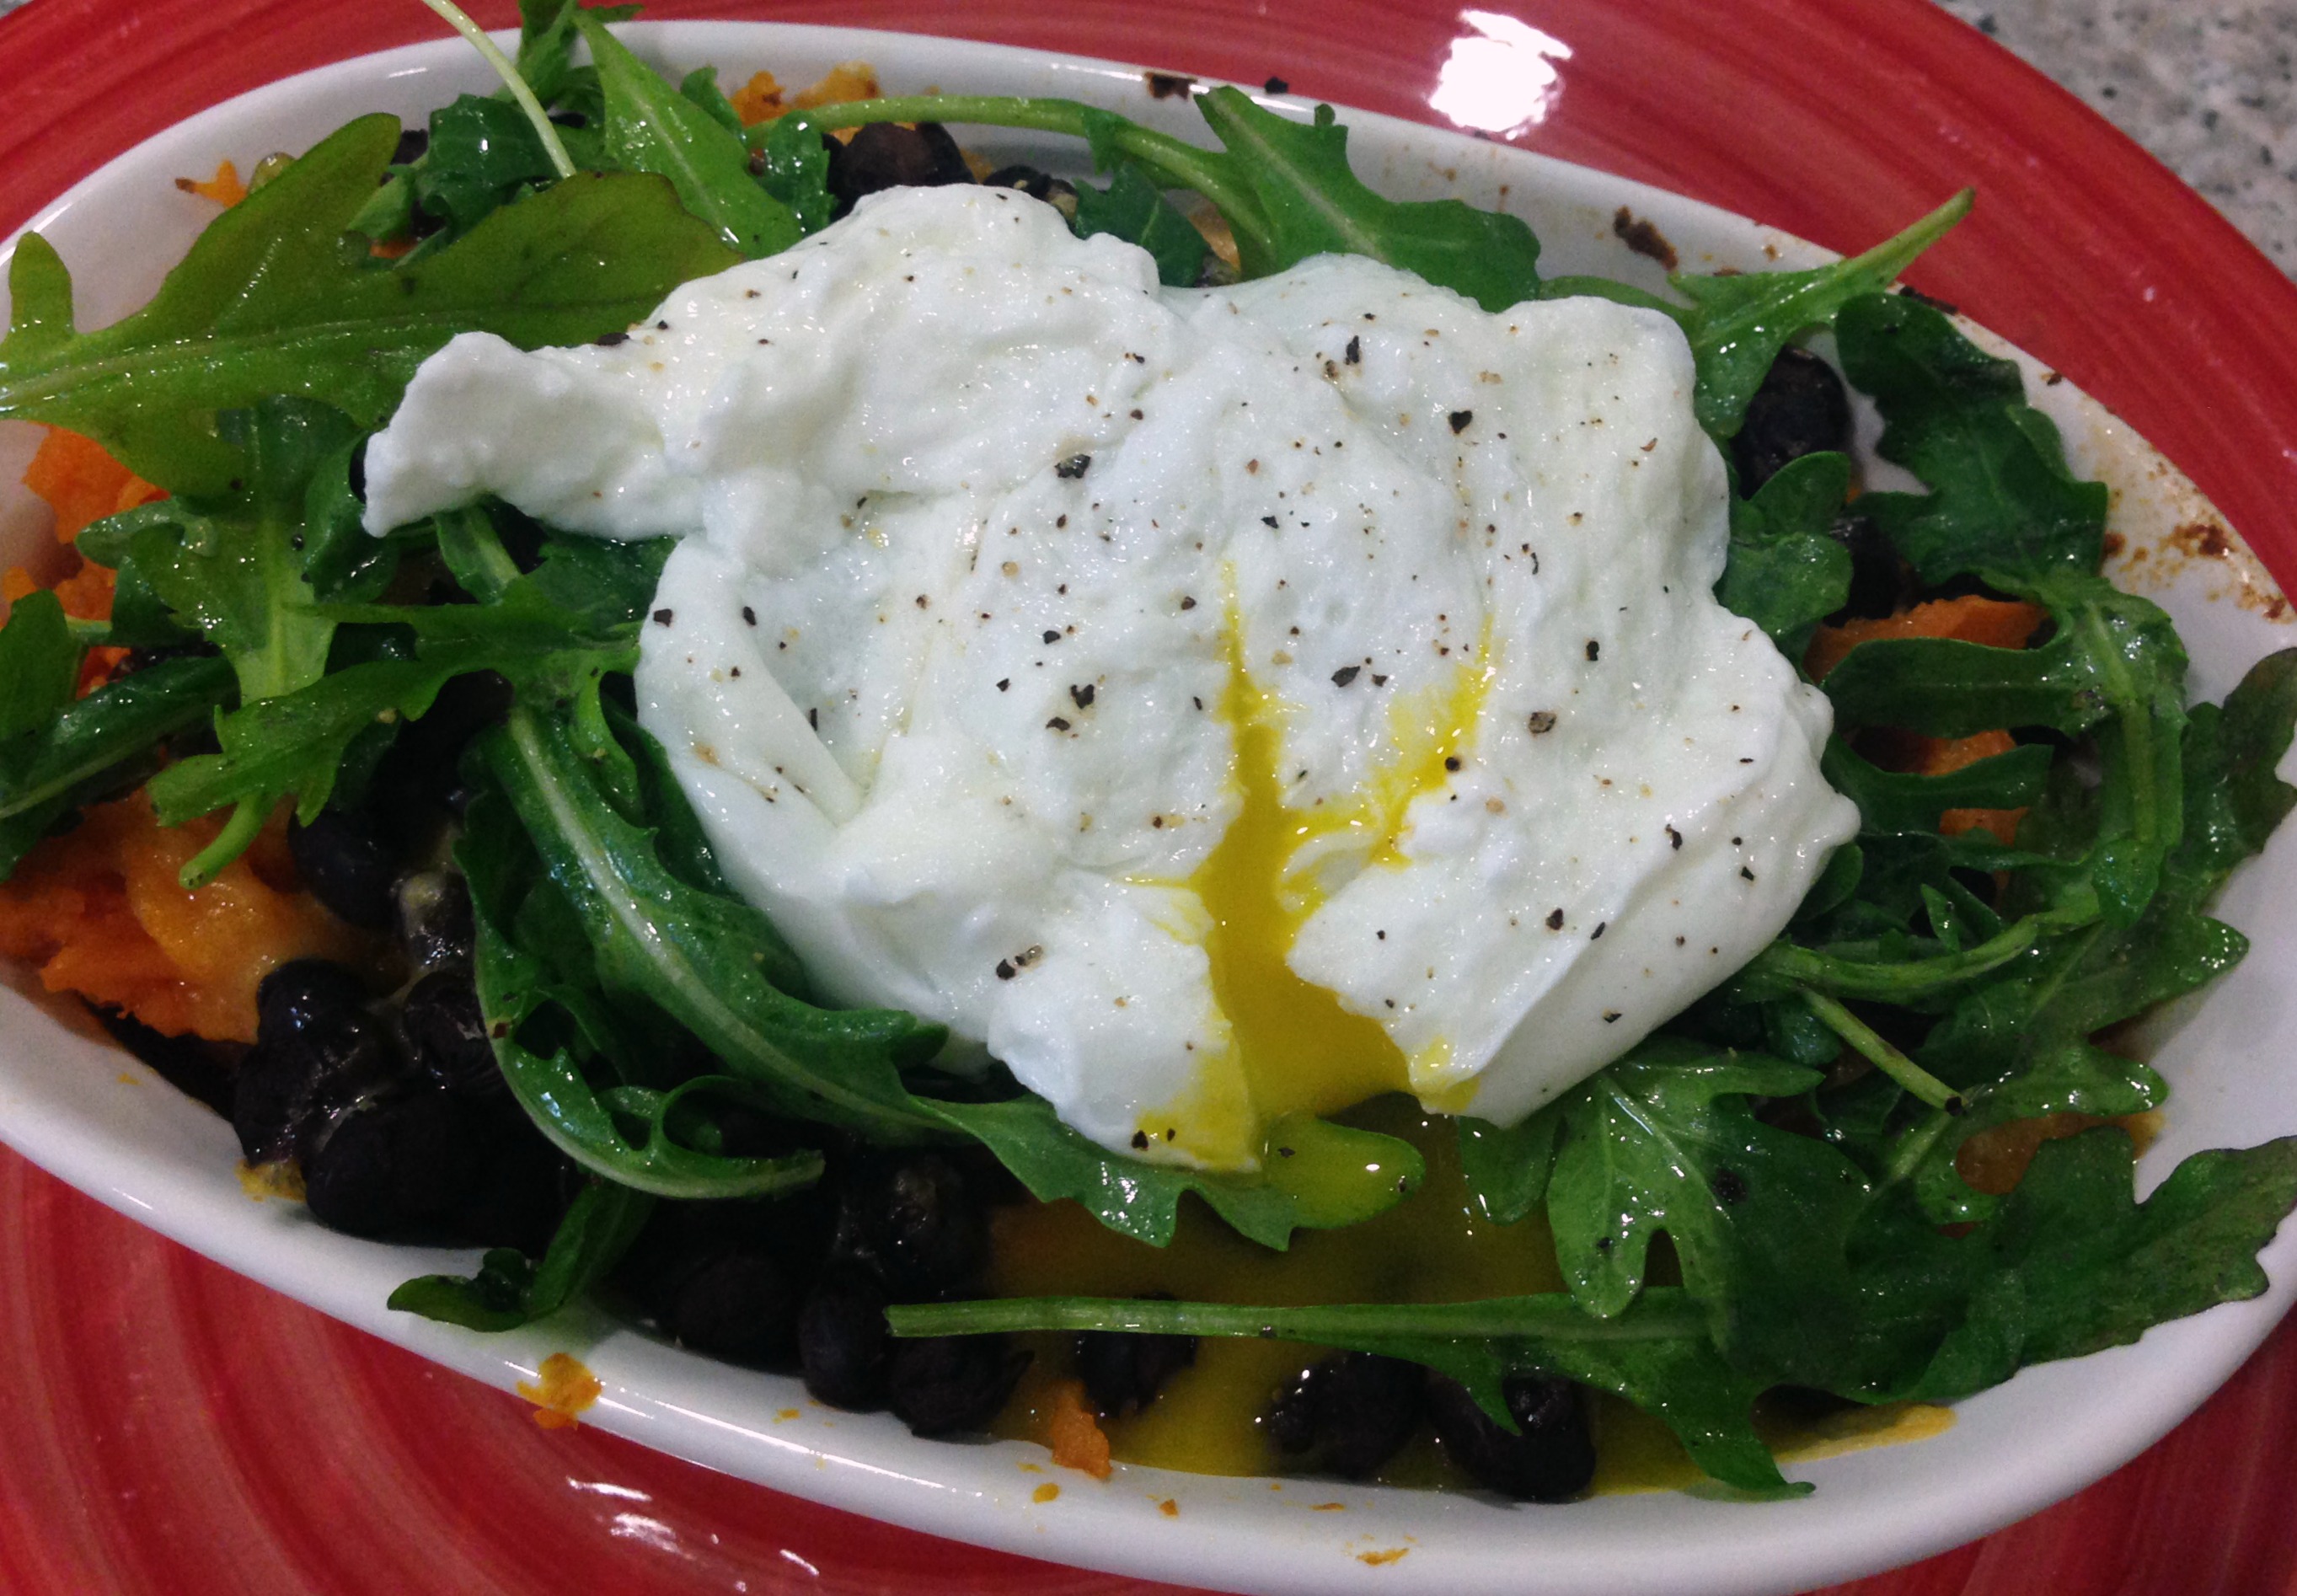
With great risk, comes great reward.

Tricks & Treats

1 Nov

For the first time in many a year, I had a very sober Halloween!  Oh, growing up is so much fun.  Instead of dressing up like a skank or a meatloaf (yes, I dressed up as a meatloaf one year), I enjoyed some Thursday Night Football at home and watched Christina finish painting my living room.

Disclaimer:  While I was much heavier in 2008, I tied half a dozen sweatshirts/pants around my torso to make myself appear like a lumpy meatloaf for this costume!

meatloaf2008

Halloween 2008

Yes, I am a meatloaf in pan.  And yes, I have a gravy cape made out of hideous thrifted curtains.  Amazeeeeeballs.

Anhoo….

I’ve been doing a really great job staying on track with food as of lately.  I’ve been cooking delicious, healthy things and snacking smart!  I know I talk a lot on this blog about the importance of where food comes from (ethically sourced/grown/local), what it contains (chemicals, GMOs, etc.), but there is another side to it as well.  It makes me absolutely sick to think about how much food I used to throw away, for no other reason than I was too lazy to store it properly.

Here are some of the week’s note-worthy dinners with a few tricks (no, not the Halloween kind) thrown in the mix!

On Tuesday we had Crockpot Beef Tacos (cooked in a yummy adobo-based sauce) and Spanish Rice. We ended up eating this beef for lunches over the next 2 days.  I will share the recipe here in a few days!

crockpotbeeftacos

I only needed 2 peppers out of a can of chipotle peppers in adobo sauce.  Buying a whole can, using just 2, and then throwing the rest out is just plain wasteful so here’s my little tip:  Puree the remaining peppers in the food processor. Then, freeze it in a log shape.  That way, I can just cut from the log as needed for future recipes!

ChipotleAdoboPuree

Also, remember when I saved big on tortillas using coupons?   I had used the fajita size wraps long ago, but the taco size tortillas were still lingering in my freezer.  I HATE how defrosted bread products taste.  Something about the composition changes and they just taste old.  Solution:  Wrap the stack of frozen tortillas in a damp paper towel and microwave on defrost setting until they are thawed.  By adding the extra moisture back into the product during the thaw, it keeps the fresh gummy-like consistency that it had when I first bought it!  Winning.  I even got Miss Picky Pants’ approval on the taste/quality of the taco shells.  Let me tell you, she would freak out if she knew they were way back from May!

On Wednesday we had this Sweet Potato, Black Bean, & Chicken Chili.

BB.SPChili

This recipe called for just 1 T. tomato paste, so I of course wanted to save the leftover tomato paste.  At one point in my life, I was buying a can of tomato paste every week, because I would toss it after using a tablespoon! I cringe even thinking about that now.  Instead of freezing it in a log, I scooped out tablespoon size dallops, froze them on a cookie sheet, and then transferred them to storage bag. (Sorry for the poor quality, I only thought to take a pic after they were frozen, so the moisture is all condensed on the bag.)

tomatopaste

So those are my tips on freezing and storing commonly used items!  It’s just as important to make sure that you make the most out of the things you buy as it is to make sure that you buy local, organic, and ethically made products.

Southwest Stuffed Portobello Caps

24 Jul

Last night, I was in a little bit of a pickle.

I had planned to make Avocado Chicken Parmesan, but when I got home I realized that we were completely out of Panko.  And pasta sauce.  Oh yeah, and Parmesan.  I must’ve just had avocados on the brain all day because the bunch I bought the other day are perfectly ripe!  At that point, I’ve got chicken ready to go but we lacked anything to go with it.  After assessing the items left in my fridge (we are desperately in need of a grocery store run), I found some giant portobello mushroom caps.  Immediately I knew this was perfect, because you can sort of modge podge together a stuffing to go in them.  Its almost impossible to go wrong.

I remembered that I had grabbed these at the store, but had yet to try them:

ChickenSausage

I knew I had a can of black beans in the pantry along with some quinoa.  I have been a little late to the quinoa party.

Quinoa

I know its loaded with protein, fiber, iron, magnesium, B2, and manganese.  I get it.  (PS – Check out the vintage print on my pantry shelf liners.  At one point, the walls were covered with the same pattern, too.)  I had been served quinoa a few times and I just wasn’t impressed.  I think you have to find your own seasoning formula for quinoa, otherwise its not that appealing.

Southwest Stuff Portobellos

SouthwestStuffedBellas

Ingredients:

  • 2 large portobello mushroom caps, stems removed
  • 3 chicken sausage links (or protein of your choice), cut into small pieces
  • 1/2 cup quinoa
  • 1/2 can of black beans
  • chicken broth
  • cooking spray/olive oil
  • Spices: chili powder, cumin, coriander, ancho chili powder, Lawry’s

1.  Prep: Preheat the oven to 450F and wipe the portobellos with a damp towel.  Prep a cooking sheet by spraying it with cooking spray.  Then, spray the mushrooms caps as well.  (You could use olive oil here, but I find that it makes mine too moist and they fall apart.)

**Steps 2-4 can be completed all at once to save time!**

2.  Since the chicken sausage was pre-cooked, I just sauteed it in a skillet to reheat it.  Then I cut it up and set it aside.

3.  I drained and rinsed the can of black beans, then mixed together a teaspoon of olive oil, cumin, coriander, and Lawry’s to taste.  I popped them in the microwave for about 3 minutes, until the beans were tender.  Then, I combined them with the chicken sausage.

4.  I cooked the quinoa in chicken broth to add instant flavor, then when it was finished cooking, I seasoned it with chili powder and ancho chili powder.  Then, I combined it in with the chicken mixture.

5.  Once all the ingredients are combined, top the mushrooms and add some cheese if you want to.  These would have been excellent with some queso blanco, but all I had was shredded cheddar.  They would have been just as good without cheese, though, too!

6.  Bake for 20 minutes or until the mushrooms are tender.

I topped mine with avocado and a little bit of plain Greek yogurt.  Delicious, healthy, and accidentally gluten-free!

SouthwestStuffedBellas

Albuquerque In Our ♥

28 Dec

One of the benefits of having Spanish in-laws:  the food!

For Christmas Eve, the MIL came over and I attempted a little heritage-themed dinner.

She brought over her famous Spanish tortilla, which is primarily made from eggs & potatoes:

SpanishTortilla

My dish, however, ended up more Tex-Mex than Spanish.  So we had an Albuquerque themed Christmas Eve dinner. ♥

ChiliColoradoBurrito3

I’m thinking that they name this recipe “Smother Chili Colorado” because its got a cowboy feel to it.  Heavy, smoky flavors and not a lot of spice.

I started by throwing a pound and a half of dry-rubbed (ancho chili powder, salt, & garlic) beef tips into a crockpot.

Then, I added a full can of red enchilada sauce and let them cook on low for 7 hours.

They literally fell apart.

ColoradoBeef

About an hour before the meat timer was scheduled to go off, I made some cilantro-lime rice (recipe below):

CilantroLimeRice

And black beans cooked in cumin, coriander, salt and pepper:

SpicedBlackBeans

Once everything was finished, I just had to assemble the burritos,

RolledBurritos

smother them with the remaining enchilada sauce and shredded cheddar cheese.

BurritosTopped

Then, I set them to broil for around 7 minutes.

We served them with a side of our favorite red beans and rice.

¡Feliz navidad!

ChiliColoradoBurrito2

Sweet Potato & Black Bean Empanadas

16 Feb

Things have been nuts lately!  She♥ and I are really working hard on our cloth diaper service to make sure out website is amazing.  So far, it is looking great!!

I thought tonight would be a great time to re-focus by doing a little empanada tutorial.  (That and I am trying to lure you back to my blog feed!)

What you will need:
2 cups flour
salt
1/4 cup canola oil
1/4 cup water
1 egg
1 cup mashed sweet potatoes
1 can black beans, drained and rinsed
1 tsp. cumin
1 T. ground acho chili powder
1 poblano pepper
1/3 cup chopped green onion
2 T. cilantro
1/4 tsp. salt
 

First, make the dough by combining the flour and salt in a large mixing bowl.  In a separate bowl, lightly beat the egg and then add the canola oil and 1/4 cup water.  Pour the oil mixture into the flour mixture gradually.  Combine until a soft dough forms.  Cover this dough in plastic and refrigerate it for 1 hour.  While the dough is setting, I usually prep the empanada mix.  By this I mean, I pop the sweet potatoes in the microwave, chop the green onions and rinse the beans.  I also prep the poblano pepper.

Intimidated by peppers?  I was too.  She♥ is Spanish, though, and I couldn’t help but fall in love with Spanish and Latino foods.  I’ve even had the experience of buying tamales from a little girl who was selling them door-to-door out of a wagon (for her abuela of course).  Anyway…back to the poblano.  This usually takes about 25 minutes, so keep that in mind as you are timing your prep out 🙂

How to:  Poblano Peppers

Preheat your broiler.  Place the poblano on a foil lined broiler pan and broil for 8 minutes.  After 6 minutes, turn the pepper over.  You are trying to blacken the pepper.  In fact, you will know it is finished broiling if the skin bubbles up and turns black:

Then, pull your poblano out, place it immediately into a paper bag and seal it tight. (No, I am not crazy.)  This is usually when I turn my broiler off and preheat my oven to 400°F. After 15 minutes, pull the pepper out and just pinch the skin.  It comes right off.  Discard this skin along with the guts of the pepper.  For the empanadas, the pepper needs to be chopped up.

Mix all your filling ingredients and spices into a large mixing bowl and mash them all up until almost smooth.

Don’t forget the sweet potatoes!

Once the hour has passed, grab your dough out of the fridge and turn it out onto a lightly floured surface.  Separate it into 10 equal balls of dough.


Roll each ball out into a 5″ disc.

Then, spoon about 3 T. of the filling onto the empanada dough. Brush the edges LIGHTLY with some lightly beaten egg white.  If you put too much egg white onto the dough, it will be too wet to seal shut.

Fold the dough over and seal shut – I usually pinch it with my fingers and then fold it up a little bit.

Place your 10 empanadas onto a foil-lined baking sheet that has been sprayed (I use canola oil cooking spray).  I cut three slits into each empanada to ventilate it like a pie.

I give them a little egg wash before I pop them into that pre-heated oven (400°, remember?) for 17-25 minutes.  They will be golden brown and crispy when done.

¡buen provecho!